Achillespees klachten hielbot (insertie klachten)

Zoals in het algemene blog over achillespees klachten te lezen is, zijn er verschillende soorten achillespees klachten. Dit artikel gaat alleen over de insertie achillespees tendinopathie. Het is belangrijk om onderscheid te maken met andere types achillespeesklachten omdat de behandeling anders is!
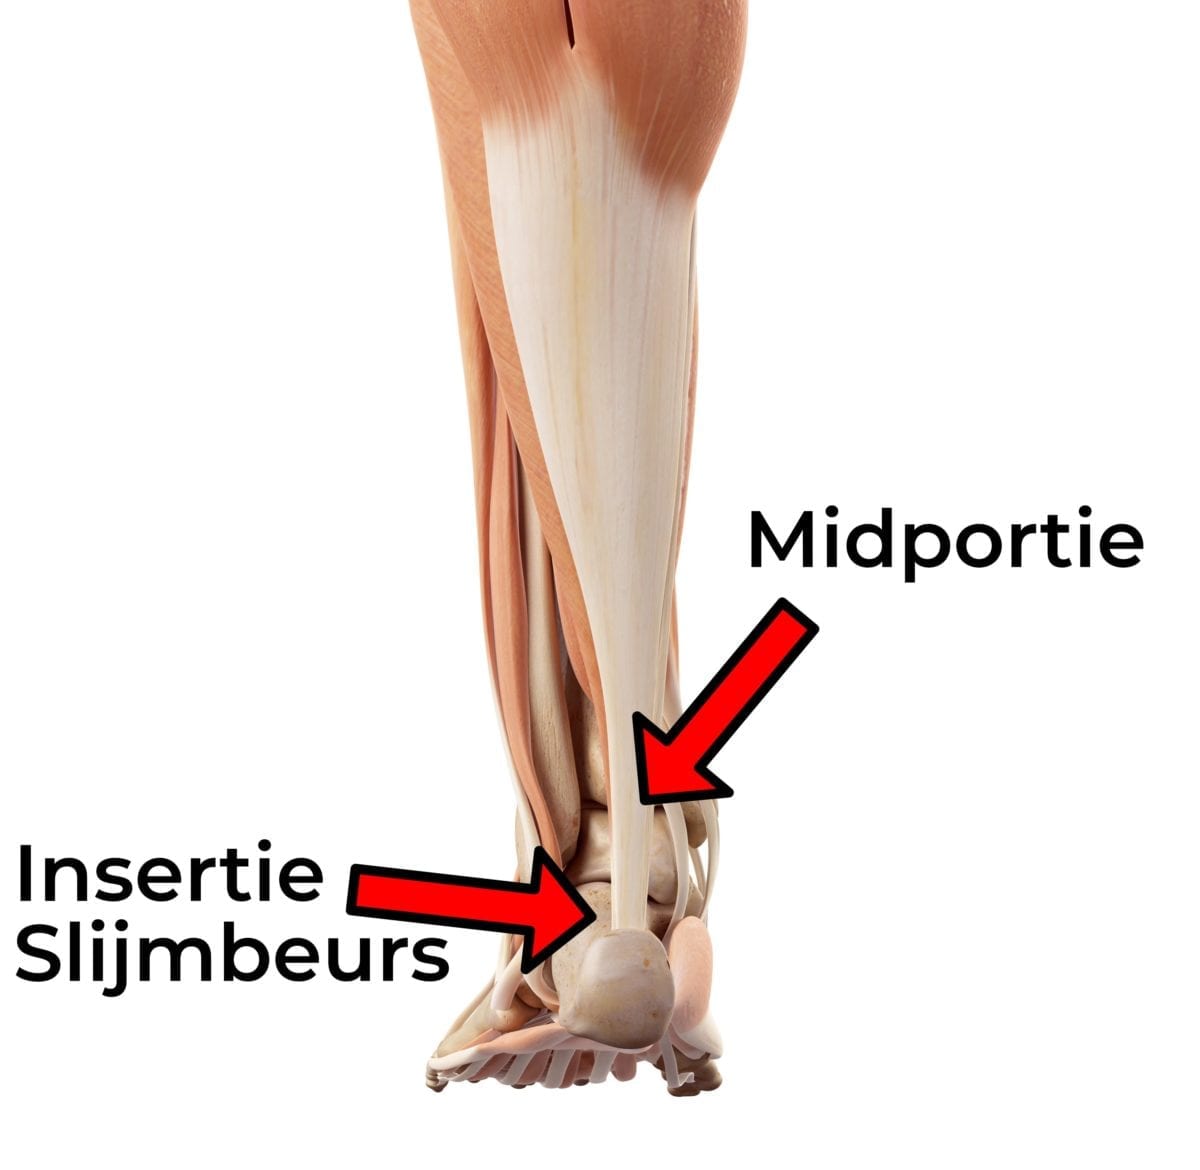
Insertie achillespees klachten bevinden zich op de plek waar de achillespees in het hielbot (calcaneus) overloopt. Dit is te zien op de afbeelding aan de rechterkant.
Wat is het verschil met andere type achillespeesklachten?
Bij de insertieklachten speelt de compressie van de pees een grote rol. Compressie van de pees tegen het hielbot komt voornamelijk voor in eindfase van dorsaalflexie (het naar je toe trekken van de tenen).
Het type oefeningen dat bij dit type achillespeesklachten hoort is dan ook anders dan de oefeningen bij een midportie achillespees klacht.
De klachten ontstaan net als bij de andere types achillespees klachten door overbelasting van de pees, lees hierover meer in het algemene blog over de achillespees.
Type insertie achillespees tendinopathie
Reactieve tendinopathie: Dit is meestal bij een toename in trainingsbelasting. Bijvoorbeeld door meer kilometers per week te lopen of meer heuvels in de training. De pees kan gezwollen en pijnlijk zijn.
Degeneratieve tendinopathie: De degeneratieve tendinopathie is als er langere tijd klachten zijn. Bij deze fase is de structuur van de pees al erg veranderd. Bij deze klachten kan de achillespees gezwollen zijn of kunnen er bobbeltjes ontstaan op de pees. Als je hiermee blijft sporten is er een kans dat de pees gedeeltelijk of geheel afscheurt. Echter moet je dan wel heel lang doorsporten.
Fases van herstel
Het herstel van de insertie achillespees klachten gaat door een aantal fases, het verschilt per persoon hoe lang de fases duren. Dit hangt namelijk af van veel factoren zoals de mate van peesschade, duur van de klachten, gezondheid van de pees, leeftijd etc.
Fase 1. Pijn vermindering
In eerste instantie is het verminderen van de pijn belangrijk, hiervoor zijn 2 stappen belangrijk.
Stap 1. Managen van de belasting
De insertieklachten worden door compressie, door hoge trekkrachten van de kuitspieren en het korter en langer worden van de pees (zoals tijdens hardlopen, springen etc.) verergerd. Om deze drie factoren aan te pakken moet een aantal maatregelen genomen worden. Om de compressie te verminderen is het belangrijk om niet in dorsaalflexie te komen. Vermijd bijvoorbeeld heuvelop lopen of de heeldrop oefeningen.
Gebruik geen schoenen waarbij de hiel erg strak zit en hierdoor druk uitoefent op de aanhechting van je achillespees. Schoenen met een hogere hak kunnen mogelijk helpen om de druk te verminderen, je kan ook gebruikmaken van een hakverhoging.
En misschien wel het belangrijkste, ga de kuitspieren niet rekken! Rekken van de kuitspieren zorgt voor compressie en kan de klachten verergeren!
Stap 2. Isometrische oefeningen
Om de pijn te verminderen en de trekkrachten te controleren, is het belangrijk om de volgende twee oefeningen uit te voeren.
Oefening 1: Isometrisch vasthouden M. Soleus
Uitvoering: Ga op de tenen staan, buig de knieën tot ongeveer 90 graden en houd deze houding vol gedurende 15 seconden. Kom vervolgens langzaam weer met de hele voet op de grond.
Herhalingen: 3×10 herhalingen per kant.
Oefening 2: Isometrisch vasthouden M. Gasctrocnemius.
Uitvoering: Ga op de tenen staan, houd de knieën gestrekt en houd deze houding vol gedurende 15 seconden. Kom vervolgens langzaam weer met de hele voet op de grond.
Herhalingen: 3×10 herhalingen per kant.
Fase 2. Kracht verbeteren
Als de pijn weg is en de klachten er niet meer zijn kan je starten met het trainen van kracht van de kuitspieren. Hiervoor zijn calfraises de juiste oefeningen. Deze oefening moet je doen zowel met gestrekte en gebogen knie. Hieronder de uitleg van de oefening:
Oefening 1: Heelraise gestrekte knie
Uitvoering: Ga op 1 been staan. Kom nu gecontroleerd op de tenen staan. Zodra je het hoogste punt hebt bereikt kom je weer rustig terug tot je hele voet aan de grond staat.
Herhalingen: 3×10 herhalingen per kant.
Oefening 2: Heelraise gebogen knie
Uitvoering: Ga op 1 been staan met gebogen knie. Kom nu gecontroleerd op de tenen staan. Zodra je het hoogste punt hebt bereikt kom je weer rustig terug tot je hele voet aan de grond staat.
Herhalingen: 3×10 herhalingen per kant.
Tijdens deze oefening horen de klachten niet toe te nemen, als dit wel het geval is de oefening nog te zwaar voor dat moment. Wat belangrijk is bij oefening 2 heelraise gebogen knie is dat je hierbij geen toename van de klachten krijgt. Als dit wel zo is moet je de knie minder ver buigen. Start bijvoorbeeld met 10 tot 15 graden kniebuiging en bouw dit uit naar 25 graden.
Fase 3: Hardlopen!
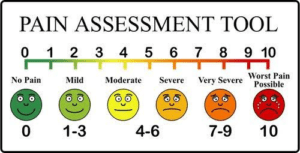
Nu begin je weer met hardlopen! Het is belangrijk dat je rustig opstart, vraag hierbij om hulp van je therapeut. Zorg ervoor dat alles wat je doet nagenoeg pijnvrij is. Het kan zo zijn dat je toch wat gevoeligheid krijgt tijdens de opbouw, zolang die op een schaal van 0 tot 10 maximaal een 4 is hoef je je niet druk te maken. Als de klachten daarna maar weer wegtrekken. Zie afbeelding 2 als voorbeeld.
Naast het starten met lopen is het belangrijk om de volgende oefeningen te doen.
Oefening 1: Triple extention
Uitvoering: Ga op 1 been staan met gebogen knie, buig hierbij je romp iets voorover. Kom nu gecontroleerd op de tenen staan waarbij je gelijktijdig je knie en heup strekt. Zodra je het hoogste punt hebt bereikt kom je weer rustig terug tot je hele voet aan de grond staat.
Herhalingen: 3×10 herhalingen per kant.
Oefening 2: Calfraise gestrekte knie met weerstand
Uitvoering: Ga op 1 been staan. Doe een grote weerstandsband om je voeten en je schouders. Kom nu gecontroleerd op de tenen staan. Zodra je het hoogste punt hebt bereikt kom je weer rustig terug tot je hele voet aan de grond staat.
Herhalingen: 3×10 herhalingen per kant.
Oefening 3: Heelraise gebogen knie met weerstand
Uitvoering: Ga op 1 been staan met gebogen knie. Doe een grote weerstandsband om de voeten en de schouders. Kom nu gecontroleerd op de tenen staan. Zodra je het hoogste punt hebt bereikt kom je weer rustig terug tot je hele voet aan de grond staat.
Herhalingen: 3×10 herhalingen per kant.